NEW!
CSHTML5 has now become OpenSilver!
We are happy to announce that CSHTML5 has been significantly improved and rebranded
to 'OpenSilver', which stands for 'Open-source reimplementation of Silverlight'. It is fully backward compatible and it can be downloaded from
OpenSilver.net. Upgrading from
CSHTML5 to OpenSilver is very easy.
Read the FAQ

C#/XAML for HTML5 usually renders each XAML object as one or more <div> elements in the HTML page. This enables to achieve most of the layout features of the Microsoft XAML language, including the Horizontal/Vertical alignment, sizing, panels such as StackPanel, Grid, WrapPanel, and more. Furthermore, C#/XAML for HTML5 provides a full implementation of the Dependency Properties system, supporting features such as properties metadata, default values, styles, locally set values, bindings, static resources, "property changed" callbacks, metadata override, value coercion, and more.
However, there are cases where all those features can lead to performance issues, especially if you are developing a very specific control that needs to render thousands of UI elements, such as a Charting or a Calendar control.
To improve performance in those specific cases, it is recommended that you use the native HTML5 <canvas> control named "HtmlCanvas", which is located in the namespace "CSHTML5.Native.Html.Controls".
This document explains what it is and how to use it.
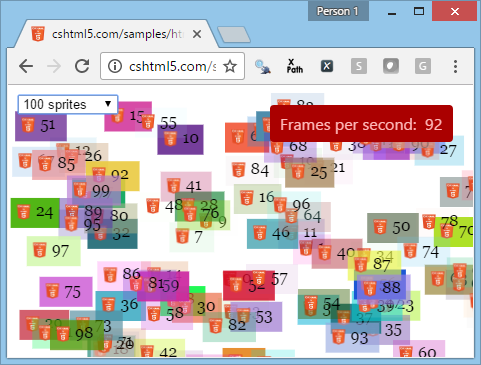
The "HtmlCanvas" control is a high performance control that renders all its children as a single native HTML5 <canvas> element. Instead of ending up with thousands of HTML elements, you end up only with a single HTML element.
IMPORTANT: The rendering is done when you call the Draw() method.
The HtmlCanvas control has a "Children" property that can contain any of the following elements:
Please refer to the "Reference" section below for details on each element.
Note: for performance reasons, those elements do not support binding, and they are always positioned relative to their container element, using (X,Y) coordinates.
<native:HtmlCanvas x:Name="HtmlCanvas1" xmlns:native="using:CSHTML5.Native.Html.Controls">
    <native:RectangleElement X="200" Y="42" Width="100" Height="50" FillColor="Blue"/>
</native:HtmlCanvas>
Then, in your C# code (for example in the Page_Loaded event), be sure to call:
HtmlCanvas1.Draw();
Note: it is important that you call the "Draw()" method only AFTER the HtmlCanvas has been added to the Visual Tree. To know whether the control is in the visual tree, you can read the "IsLoaded" property, which should be equal to "true".
Use the code below to display 10,000 colored rectangles.
Note: this example is intended to be tested in the browser rather than the Simulator because the Simulator is much slower at working with the HtmlCanvas control due to underlying C#/JS interop calls.
private void Button_Click(object sender, RoutedEventArgs e)
{
    if (!CSHTML5.Interop.IsRunningInTheSimulator)
    {
        Random rand = new Random();
        double x, y, w, h;
        CSHTML5.Native.Html.Controls.RectangleElement r;
        double canvasWidth = HtmlCanvas1.ActualWidth;
        double canvasHeight = HtmlCanvas1.ActualHeight;
        HtmlCanvas1.Children.Clear();
        for (int i = 0; i < 10000; i += 1)
        {
            w = rand.Next(10, 100);
            h = rand.Next(10, 100);
            x = rand.Next((int)canvasWidth - (int)w);
            y = rand.Next((int)canvasHeight - (int)h);
            r = new CSHTML5.Native.Html.Controls.RectangleElement(x, y, w, h);
            HtmlCanvas1.Children.Add(r);
            r.FillColor = Color.FromArgb((byte)rand.Next(256), (byte)rand.Next(256), (byte)rand.Next(256), (byte)rand.Next(256));
        }
        HtmlCanvas1.Draw();
    }
    else
    {
        System.Windows.MessageBox.Show("This demo is too slow to run in the Simulator. Please run in the browser instead.");
    }
}
XAML code:
     <Grid>
        <native:HtmlCanvas Name="HtmlCanvas1" xmlns:native="using:CSHTML5.Native.Html.Controls"/>
        <Button Content="Click to render" HorizontalAlignment="Center" VerticalAlignment="Center" Click="Button_Click"/>
    </Grid>
You can run the sample online here.
You can download the full source code from GitHub at the following URL (just click the green button named "Clone or download"):
https://github.com/cshtml5/CSHTML5.Demos.HtmlCanvasPerformance1
<native:HtmlCanvas Width="100" Height="100" xmlns:native="using:CSHTML5.Native.Html.Controls">
     <!-- Place children here -->
</native:Canvas>
Example in C#:
HtmlCanvas myCanvas = new HtmlCanvas();
myCanvas.Width = 100;
myCanvas.Height = 100;
The following elements that can be added to the "HtmlCanvas.Children" collection:
<native:HtmlCanvas Width="1000" Height"500" xmlns:native="using:CSHTML5.Native.Html.Controls">
    <native:RectangleElement X="200" Y="42" Width="100" Height="50" FillColor="Blue"/>
</native:HtmlCanvas>
<native:HtmlCanvas Width="1000" Height"500" xmlns:native="using:CSHTML5.Native.Html.Controls">
    <native:TextElement X="200" Y="42" Text="I am the text" Font="20px Arial"/>
</native:HtmlCanvas>
<native:HtmlCanvas Width="1000" Height="500" xmlns:native="using:CSHTML5.Native.Html.Controls">
    <native:LineElement X1="200" Y1="42" X2="100" Y2="50" StrokeColor="Red" LineWidth="2"/>
</native:HtmlCanvas>
<native:HtmlCanvas Width="1000" Height"500" xmlns:native="using:CSHTML5.Native.Html.Controls">
    <native:ImageElement Source="ms-appx:///MyAssembly/MyFolder/Image.png" X="200" Y="42" Width="100" Height="50"/>
</native:HtmlCanvas>
You can create classes that inherit from the "ContainerElement" class in order to encapsulate and reuse portions of the rendering, such as sprites in a game or business objects in a business application. For example, if you are developing a Calendar control using a single HtmlCanvas control, you may want to create a "DayElement" class that is in charge of rendering a single day, by making the "DayElement" class inherit from the "ContainerElement" class. In the constructor of the "DayElement" class, you may create all the elements needed to render a single day - such as a "TextElement" for the day number - and add them to the "Children" collection of the "DayElement" class. Then, to render the whole calendar, you may instantiate as many instances of the "DayElement" class as there are days in the calendar, and add them to the "Children" collection of the "HtmlCanvas" control.
<native:HtmlCanvas Width="1000" Height"500" xmlns:native="using:CSHTML5.Native.Html.Controls">
    <native:ContainerElement X="200" Y="42" Width="100" Height="50" FillColor="Blue">
        <!-- Place children here -->
    </native:ContainerElement>
</native:HtmlCanvas>
A more complete example of use of the ContainerElement can be found at:
https://github.com/cshtml5/CSHTML5.Demos.HtmlCanvasPerformance1
IMPORTANT: The rendering is done only when you call the "HtmlCanvas.Draw()" method.
The following methods are available to all the elements above:
The following events are available to all the elements above:
Please note that, if you make changes to the UI of the HtmlCanvas, you need to call the "Draw()" method to refresh. For convenience, the class "HtmlCanvasPointerRoutedEventArgs" passed to the event handlers contains a reference to the parent HtmlCanvas control.
Please click here for contact information.
 follow us on
twitter
follow us on
twitter
 find us on
facebook
find us on
facebook
 be active on the
forums
be active on the
forums
 view source on
GitHub
view source on
GitHub